

Installing an led display wall may seem like a complex task, but with proper planning and the right approach, it can be completed efficiently and safely. Whether you’re setting up a large screen for an event, a storefront, or a control room, this guide will walk you through the key steps to ensure a smooth installation.
Step 1: Prepare the Installation Site
Before any hardware is installed, evaluate the site. Make sure the wall or frame where the screen will be mounted is level, sturdy, and able to support the weight of the LED modules and brackets. Check for access to power, ventilation, and network wiring if needed.
Step 2: Unpack and Inspect the Equipment
Carefully unbox each LED cabinet, power supply, control card, and all accessories. Check for any signs of damage during shipping. It’s also helpful to power on each cabinet before mounting to confirm all LEDs are working properly.
Step 3: Build the Supporting Structure
Install the mounting structure or frame according to the screen dimensions. The structure must be precisely aligned both horizontally and vertically, as even a slight angle can cause visible misalignment between modules. Use a level and laser tools if available.
Step 4: Install the LED Cabinets
Start from the bottom row and work your way up. Connect the LED cabinets securely to the frame. Most systems use locking mechanisms to align and fix cabinets in place. Ensure each cabinet is flush with its neighbor for a seamless look.
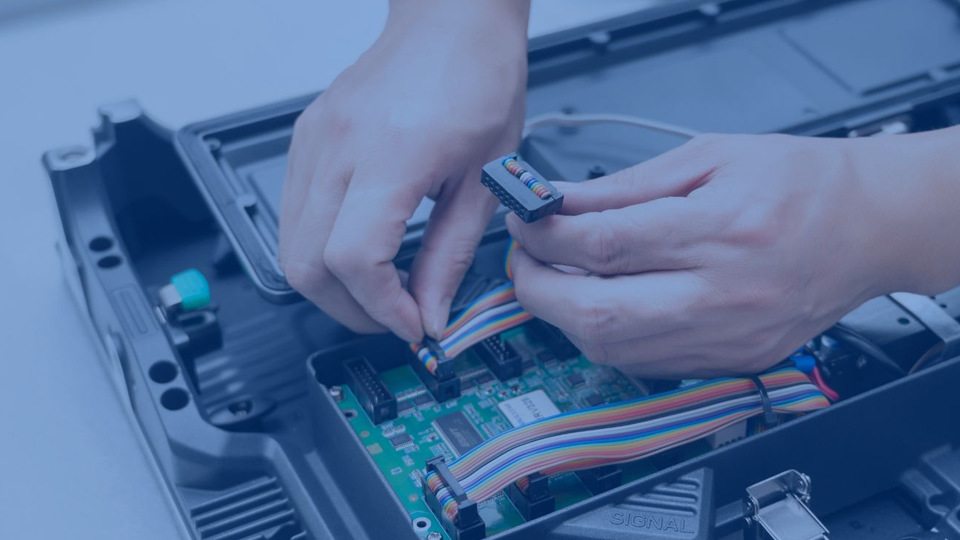
Step 5: Connect Power and Signal Cables
Each cabinet needs power and signal connections. Daisy-chain the power cables according to the supplier’s recommendations to avoid overload. Connect the signal cables (usually Ethernet or fiber) from the sender box to the receiving cards in each cabinet.
Step 6: Configure the Control System
Once the hardware is in place, connect the control system (such as NovaStar or Colorlight). Use the accompanying software to configure screen dimensions, pixel mapping, brightness, and color settings. If necessary, calibrate the screen for color and uniformity.
Step 7: Test the Full Screen
Turn on the full display and play different types of content to check for dead pixels, brightness inconsistencies, or misalignments. Walk around the viewing area to see how the display looks from different angles. Fix any minor alignment issues or cable problems at this stage.
Step 8: Final Safety and Stability Check
Ensure all bolts and fasteners are tightened. If the installation is in a public area, confirm that there are no exposed wires or unstable components. A stable structure ensures safety and long-term performance.